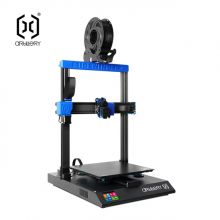
Sidewinder X2
| Sidewinder X2 Status: beta [box doku] | |
|---|---|

| |
| Description | Artillery Sidewinder X2 |
| Owner | MuMaLab |
| Financing | Bought from official Vendor (€470) |
In addition to the two Prusa Minis which are our main 3d Printers at the lab we now have a Sidewinder X2 for larger print jobs.
- Please bring your own filament and only use plain PLA. Additives like wood or carbon wear out the nozzles extremely quickly.
- The printer is now open to very experieced user and standard PLA Filament. Please ask on #3d_printing slack channel before usage.
- If you want to help calibrate the printer or help with the wiki site, please contact @yichen zhang on slack to get the newest update on the printer.
Details
- Build volume 300 x 300 x 400 mm
- UBL mesh bed leveling enabled
- Printable via USB Stick
- Material: plain 1.75mm PLA
Quickstart guide
If you haven't used the printer, register for the monthly 3D printing intro course or ask in the 3d_printing channel on Slack beforehand.
INFO: As of 29.09.2022, this printer hasn't been included in 3D printing intro course
- Slice your .stl in PrusaSlicer
- Use the official presets for the Artillery Sidewinder X2 (same as for the X1)
- Add "Artillery" in the "Other Vendors" tab
- Add the "Artillery Sidewinder X1" on the "Artillery FFF" tab that should have appeared
- Select "Artillery Sidewinder X1 BL-TOUCH" as your printer
- Edit the start Gcode under Printer setting in advanced mode and add M420 S1 Z2 after G28 command to enable mesh bed leveling
- Get the USB stick that's in the printer, export to the USB via the button on the bottom right in PrusaSlicer, and put it back into the printer
- Verify that you're about to start the right print via the filename
Finished Calibration
- Marlin Firmware on Ruby board has beed updated to 2.0.9.3
- TFT Firmware has been updated with Unified Icon
- Used Firmware link
- Belt tightness checked
- Manual bed leveling done
- Unified bed Mesh leveling done (EEPROM slot 1)
- PID Autotune done for 215 nozzle / 60 bed
- Probe offset set
To do list
Suggestions and Feedback
Do you have any suggestions or feedback in regard to the printer, its maintainance and its current status?
