Archive:MuMaBot: Difference between revisions
(initial page) |
m (Vrs moved page MuMaBot to Archive:MuMaBot without leaving a redirect) |
||
| (10 intermediate revisions by 3 users not shown) | |||
| Line 1: | Line 1: | ||
{{outdated|type=member project}} | |||
{{project | {{project | ||
|name = MuMaBot | |name = MuMaBot | ||
| Line 16: | Line 18: | ||
== 3D printed parts == | == 3D printed parts == | ||
original files: http://www.thingiverse.com/thing:1265766/#files | |||
These parts only fit for the expensive Servos, the cheap ones use other screws (only 2 instead of 4) | |||
=== body === | === body === | ||
| Line 26: | Line 29: | ||
=== weapons? === | === weapons? === | ||
t.b.d. | t.b.d. | ||
== electronics == | == electronics == | ||
t.b.d. | t.b.d. | ||
=== servo driver === | |||
We decided to use a 16 channel I2C PWM controller to drive all servos smooth. The reason is, that ESP8266 has no full realtime OS support! (because of doing the WiFi stuff builtin with interrupts) | |||
We use this [http://www.aliexpress.com/item/1pc-PCA9685-16-Channel-12-bit-PWM-Servo-motor-Driver-I2C-Module-For-Arduino-Robot-Worldwide/32583768900.html?spm=2114.01010208.3.2.Xrxr4m&ws_ab_test=searchweb201556_1,searchweb201644_2_505_506_503_504_301_502_10001_10002_10016_10017_10010_10005_10011_10006_10003_10004_10009_10008,searchweb201560_1,searchweb1451318400_-1,searchweb1451318411_6451&btsid=bc3ceecc-2723-4b81-9e26-f84395e07cb5 16 channel I2C PWM controller] | |||
The [[#software|software]] is also changed to use I2C instead of making PWM by ESP8266 | |||
=== servos === | |||
- current [[Hobbyking]] bulk order | |||
=== remote control === | === remote control === | ||
| Line 43: | Line 55: | ||
t.b.d. | t.b.d. | ||
=== indoor navigation === | |||
maybe based on [https://hackaday.io/project/4872-subpos-positioning-system SubPos] | |||
== software == | == software == | ||
=== build environment === | |||
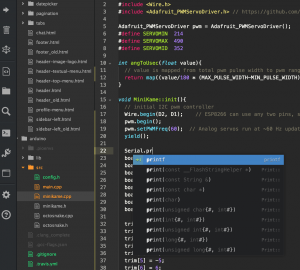
[[File:PlatformIO-Atom-code-completion.png|thumb|PlatformIO in Atom.io editor with code completion and build-in terminal]] | |||
* ArduinoIDE (1.6.5) | |||
* [http://docs.platformio.org/en/latest/ide/atom.html PlatformIO] plugin for Atom.io | |||
==== PlatformIO & Atom.io ==== | |||
# [http://docs.platformio.org/en/latest/ide/atom.html#installation install] | |||
# [http://docs.platformio.org/en/latest/ide/atom.html#quickstart quickstart] | |||
#* add project folder (select '''<git-path>/miniKame/code/arduino''') | |||
# [http://platformio.org/#!/lib/show/30/Adafruit-PWM-Servo install Adafruit-PWM-Servo library] by type '''pio lib install 30''' in the PlatformIO terminal window | |||
# Menu > PlatformIO > '''Initialize new Project (or update existing)''' | |||
## select board: '''WeMos D1 mini''' or '''NodeMCU 0.9 / 1.0''' | |||
## choose the directory: '''<git-path>/miniKame/code/arduino | |||
## press '''Initialize''' | |||
<br clear=all> | |||
=== source === | |||
MuMaLab [https://github.com/munichmakerlab/miniKame gitHub fork of miniKame] | |||
=== network === | === network === | ||
Latest revision as of 16:02, 10 September 2022
| MuMaBot Release status: experimental [box doku] | |
|---|---|
| Description | small bot with 4 legs and ESp8266 WiFi Chip (based on miniKame) |
| Author(s) | Peter, Severin, Jörg, Heiko, Jorgen, ThomasE |
We want to build some small miniKame based bots and extend them as MuMaLab bot collective mesh network and many more..
3D printed parts
original files: http://www.thingiverse.com/thing:1265766/#files These parts only fit for the expensive Servos, the cheap ones use other screws (only 2 instead of 4)
body
t.b.d.
legs
t.b.d.
weapons?
t.b.d.
electronics
t.b.d.
servo driver
We decided to use a 16 channel I2C PWM controller to drive all servos smooth. The reason is, that ESP8266 has no full realtime OS support! (because of doing the WiFi stuff builtin with interrupts)
We use this 16 channel I2C PWM controller
The software is also changed to use I2C instead of making PWM by ESP8266
servos
- current Hobbyking bulk order
remote control
t.b.d.
sensors
t.b.d.
lights
t.b.d.
line detect
t.b.d.
maybe based on SubPos
software
build environment
- ArduinoIDE (1.6.5)
- PlatformIO plugin for Atom.io
PlatformIO & Atom.io
- install
- quickstart
- add project folder (select <git-path>/miniKame/code/arduino)
- install Adafruit-PWM-Servo library by type pio lib install 30 in the PlatformIO terminal window
- Menu > PlatformIO > Initialize new Project (or update existing)
- select board: WeMos D1 mini or NodeMCU 0.9 / 1.0
- choose the directory: <git-path>/miniKame/code/arduino
- press Initialize
source
MuMaLab gitHub fork of miniKame
network
t.b.d.
movements
t.b.d.


