Sidewinder X2: Difference between revisions
Jump to navigation
Jump to search
No edit summary |
Spacezhang (talk | contribs) No edit summary |
||
| (2 intermediate revisions by the same user not shown) | |||
| Line 13: | Line 13: | ||
In addition to the two [[Prusa Mini|Prusa Minis]] which are our main 3d Printers at the lab we now have a Sidewinder X2 for larger print jobs. | In addition to the two [[Prusa Mini|Prusa Minis]] which are our main 3d Printers at the lab we now have a Sidewinder X2 for larger print jobs. | ||
* Please bring your own filament and only use plain PLA. Additives like wood or carbon wear out the nozzles extremely quickly. | * Please bring your own filament and only use plain PLA. If you would like to print materials other then PLA please write in the #3d_printing channel on slack. Additives like wood or carbon wear out the nozzles extremely quickly. | ||
* The printer is | * The printer is open to experieced user. Please ask on #3d_printing slack channel before usage if you are not familiar with the machine. | ||
== Details == | == Details == | ||
* UBL mesh bed leveling enabled | * UBL mesh bed leveling enabled | ||
* Printable via USB Stick and micro SD card | * Printable via USB Stick and micro SD card | ||
* Material: plain 1.75mm PLA | * Material: plain 1.75mm PLA normally | ||
== Quickstart guide== | == Quickstart guide== | ||
''' If you haven't used the printer but already visited one of the monthly [https://tickets.mumalab.org/courses/ 3D printing intro course], please for now contact @yichen zhang on slack for a 15 - 30 min quick introduction to the machine. ''' <br> | ''' If you haven't used the printer but already visited one of the monthly [https://tickets.mumalab.org/courses/ 3D printing intro course], please for now contact @yichen zhang on slack for a 15 - 30 min quick introduction to the machine. ''' <br> | ||
* Please visually inspect the printer for visible damage before usage. | * Please visually inspect the printer for visible damage before usage. | ||
** If damage is been found please contact @yichen zhang on slack. Thank you. | ** If damage is been found please contact @yichen zhang on slack. Thank you. | ||
* | * Download [https://github.com/prusa3d/PrusaSlicer PrusaSlicer] | ||
* Please use the official Artillery Sidewinder X1 presets for the Sidewinder X2 | * Please use the official Artillery Sidewinder X1 presets for the Sidewinder X2 | ||
** Add "Artillery" in the "Other Vendors" tab | ** Add "Artillery" in the "Other Vendors" tab | ||
** Add the "Artillery Sidewinder X1" on the "Artillery FFF" tab | ** Add the "Artillery Sidewinder X1" on the "Artillery FFF" tab | ||
** Select "Artillery Sidewinder X1 BL-TOUCH" as your printer | ** Select "Artillery Sidewinder X1 BL-TOUCH" as your printer | ||
* Get the USB stick that's | * Slice your 3D Object as normal | ||
* Get the USB stick that's on the printer and export your sliced model onto it. | |||
* Power up the machine via the power switch on the backside of the machine. | * Power up the machine via the power switch on the backside of the machine. | ||
* Preheat the nozzle via the load/unload menu of the machine (210°C Recommended) | * Preheat the nozzle via the load/unload menu of the machine (210°C Recommended) | ||
* Insert your filament through | * Insert your filament through the filament runout sensor and into the extruder. | ||
** Then use the load filament function from the machine to load and purge the filament. | ** Then use the load filament function from the machine to load and purge the filament. | ||
* Check that no particle is trapped between the magnetic sticker and magnetic PEI Sheet as we are using stored mesh bed leveling data (because mesh bed leveling takes a long time for a machine this size, if you want to ensure perfect quality feel free to redo the mesh bed leveling for your specific print.) | * Check that no particle is trapped between the magnetic sticker and magnetic PEI Sheet as we are using stored mesh bed leveling data (because mesh bed leveling takes a long time for a machine this size, if you want to ensure perfect quality feel free to redo the mesh bed leveling for your specific print.) | ||
* Clean the magnetic PEI sheet with IPA | * Clean the magnetic PEI sheet with IPA | ||
* Verify that you're about to start the right print via the filename | * Verify that you're about to start the right print via the filename the start your print. | ||
* Please at least wait for the first layer to be printed and verify its quality. | * Please at least wait for the first layer to be printed and verify its quality. | ||
* Please check the print regularly during printing. Please don't leave the Lab while printing. Thank you. | * Please check the print regularly during printing. Please don't leave the Lab while printing. Thank you. | ||
* After printing, preheat and use the unload filament function to unload your filament. Please home the machine before shutting it down. | * After printing, preheat and use the unload filament function to unload your filament. Please home the machine before shutting it down. | ||
== Guide Video == | == Guide Video == | ||
[ | A really nice [https://www.youtube.com/watch?v=SCog2i3vVlk Review Video] on youtube. | ||
== Finished calibration == | == Finished calibration == | ||
* Marlin Firmware on Ruby board has beed updated to 2.0.9.3 | * Marlin Firmware on Ruby board has beed updated to 2.0.9.3 | ||
| Line 73: | Line 59: | ||
== To do list == | == To do list == | ||
* Flow rate calibration | * Flow rate calibration | ||
* Torture test | * Torture test | ||
== Machine Update == | == Machine Update == | ||
* 3.11.2022: [https://www.aliexpress.com/item/4001276183036.html?spm=a2g0o.order_list.order_list_main.17.21ef1802cX4xi7 Magnetic PEI springsteel bed] installed | * 3.11.2022: [https://www.aliexpress.com/item/4001276183036.html?spm=a2g0o.order_list.order_list_main.17.21ef1802cX4xi7 Magnetic PEI springsteel bed] installed | ||
* 10.12.2022: Reverse Bowden setup is now complete (Using [https://www.thingiverse.com/thing:5257221 Side Spool Guide for Artillery Sidewinder X2]) by DaRaX. The machine has been move down to its intended space on the low slot of the shelf. | * 10.12.2022: Reverse Bowden setup is now complete (Using [https://www.thingiverse.com/thing:5257221 Side Spool Guide for Artillery Sidewinder X2]) by DaRaX. The machine has been move down to its intended space on the low slot of the shelf. | ||
* 28.07.2024: The damaged PEI Sheet has been changed out for a new one. | |||
== Maintenance update == | == Maintenance update == | ||
Next planned maintanance of the machine: | Next planned maintanance of the machine: | ||
* 1. | * 1.10.2024 | ||
== Upgrades == | == Upgrades == | ||
* Magnetic PEI bed (Or other removable print bed) | * Magnetic PEI bed (Or other removable print bed) | ||
Revision as of 16:36, 28 July 2024
| Sidewinder X2 Status: working [box doku] | |
|---|---|
| |
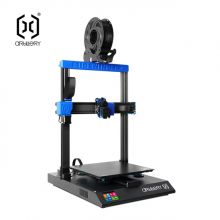
| Description | Artillery Sidewinder X2 |
| Owner | MuMaLab |
| Financing | Bought from official Vendor (€412) |
| Build Volume | 300 x 300 x 400 mm (11.8 x 11.8 x 15.7 in) |
| Nozzle | 0.4 mm stainless steel |
In addition to the two Prusa Minis which are our main 3d Printers at the lab we now have a Sidewinder X2 for larger print jobs.
- Please bring your own filament and only use plain PLA. If you would like to print materials other then PLA please write in the #3d_printing channel on slack. Additives like wood or carbon wear out the nozzles extremely quickly.
- The printer is open to experieced user. Please ask on #3d_printing slack channel before usage if you are not familiar with the machine.
Details
- UBL mesh bed leveling enabled
- Printable via USB Stick and micro SD card
- Material: plain 1.75mm PLA normally
Quickstart guide
If you haven't used the printer but already visited one of the monthly 3D printing intro course, please for now contact @yichen zhang on slack for a 15 - 30 min quick introduction to the machine.
- Please visually inspect the printer for visible damage before usage.
- If damage is been found please contact @yichen zhang on slack. Thank you.
- Download PrusaSlicer
- Please use the official Artillery Sidewinder X1 presets for the Sidewinder X2
- Add "Artillery" in the "Other Vendors" tab
- Add the "Artillery Sidewinder X1" on the "Artillery FFF" tab
- Select "Artillery Sidewinder X1 BL-TOUCH" as your printer
- Slice your 3D Object as normal
- Get the USB stick that's on the printer and export your sliced model onto it.
- Power up the machine via the power switch on the backside of the machine.
- Preheat the nozzle via the load/unload menu of the machine (210°C Recommended)
- Insert your filament through the filament runout sensor and into the extruder.
- Then use the load filament function from the machine to load and purge the filament.
- Check that no particle is trapped between the magnetic sticker and magnetic PEI Sheet as we are using stored mesh bed leveling data (because mesh bed leveling takes a long time for a machine this size, if you want to ensure perfect quality feel free to redo the mesh bed leveling for your specific print.)
- Clean the magnetic PEI sheet with IPA
- Verify that you're about to start the right print via the filename the start your print.
- Please at least wait for the first layer to be printed and verify its quality.
- Please check the print regularly during printing. Please don't leave the Lab while printing. Thank you.
- After printing, preheat and use the unload filament function to unload your filament. Please home the machine before shutting it down.
Guide Video
A really nice Review Video on youtube.
Finished calibration
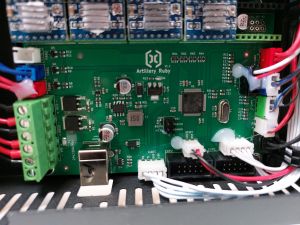
- Marlin Firmware on Ruby board has beed updated to 2.0.9.3
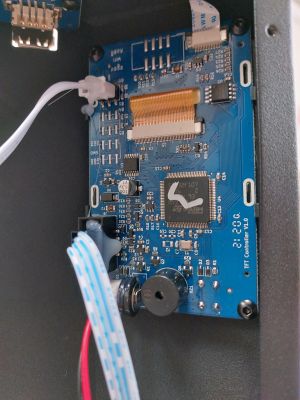
- TFT Firmware has been updated with Unified Icon
- Used Firmware link
- Belt tightness checked
- Manual bed leveling done
- Unified bed Mesh leveling done (EEPROM slot 1)
- PID Autotune done for 215 nozzle / 60 bed
- Probe offset set
To do list
- Flow rate calibration
- Torture test
Machine Update
- 3.11.2022: Magnetic PEI springsteel bed installed
- 10.12.2022: Reverse Bowden setup is now complete (Using Side Spool Guide for Artillery Sidewinder X2) by DaRaX. The machine has been move down to its intended space on the low slot of the shelf.
- 28.07.2024: The damaged PEI Sheet has been changed out for a new one.
Maintenance update
Next planned maintanance of the machine:
- 1.10.2024
Upgrades
- Magnetic PEI bed (Or other removable print bed)
- Raspberry Pi (Octoprint upgrade)
- All metal hotend
- Better cooling fan
- Better Nozzle
- Reinforcement bar for ringing reduction
- USB Extender for longevity of USB Port
Test Prints
Technical Details
Boring stuff for the documentation
Machine Construction
Packaging
Discussion
- Switch to 0.6mm Nozzle
[Description comming soon]
Suggestions and Feedback
Do you have any suggestions or feedback in regard to the printer, its maintainance and its current status?
Please write your comments below!
- [Comment]
