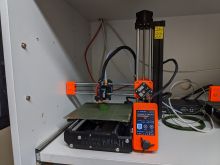
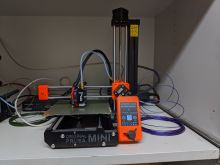
Prusa Mini
Jump to navigation
Jump to search
| Lusa Status: working [box doku] | |
|---|---|

| |
| Description | Original Prusa MINI |
| Owner | MuMaLab |
| Financing | Bought from official Vendor (380€) |
| IP | 10.10.20.45 |
| Link | http://10.10.20.45 |
| Rusa Status: working [box doku] | |
|---|---|

| |
| Description | Original Prusa MINI |
| Owner | MuMaLab |
| Financing | Bought from official Vendor (380€) |
| IP | 10.10.20.46 |
| Link | http://10.10.20.46 |
We currently have two Original Prusa Minis for basic printing with PLA at the lab. They are called Lusa and Rusa.
- Please bring your own filament and only use plain PLA. Additives like wood or carbon wear out the nozzles extremely quickly.
- Refer to the Whiteboard inside of the Laser & 3D Lounge for currently attached nozzle sizes. By default, there should be one printer with a 0.4 nozzle and one with a 0.6 nozzle.
Details
- Build volume 18 x 18 x 18 cm | 7 x 7 x 7 in
- Nozzles 0.4mm or 0.6mm for 1.75mm Filament.
- Removable magnetic spring steel sheet with PEI surface
- Printable via USB Stick
- Material: plain PLA
Usage
If you haven't used the printer, register for the monthly 3D printing intro course or ask in the 3d_printing channel on Slack beforehand.
- Slice your .stl in PrusaSlicer
- Use the official presets for the Original Prusa MINI. Make sure to adjust the nozzle diameter (see above) And the Filament of choice
- Get the USB stick that's in the printer, export to the USB via the button on the bottom right in PrusaSlicer, and put it back into the printer
- Verify that you're about to start the right print - the display shows an image preview of your model
- You can monitor your print via PrusaControl
Printer repair log
- 09.12.2022 Lusa is out of service due to failing bed mesh leveling
- Bed mesh calibration is failing on Lusa, therefore it is currently out of service.
- Bed mesh calibration is failing on Lusa, therefore it is currently out of service.
- 10.12.2022 Lusa resquared and back online
- Firmware reflashed
- linear rods are cleaned and lubricant applied
- rough surface cleaning and screws retightened
- Axis resquared (about 1mm difference still visible after resquaring, but could be compensated by mesh bed leveling)
- first layer Z-Step recalibrated
The Issue should be resolved. During calibration on issue is encountered that occationally the mesh bed leveling only goes to the third position instead of the fourth. If any other print issue is encountered, especially strange behavoir with mesh bed leveling, please report in #3d_printing channel.
