PrusaSlicer
We currently prefer PrusaSlicer for our printers in the Lab. This is how to use it
Installation
- Download the latest version here
- Install
- Launch
Add Printers
We have configurations available for the more advanced printers (e.g. not the Prusa Minis). If you really actually need them you can ask for them in the 3d-printing channel on slack.
- PrusaSlicer should open the configuration wizard on its first launch automatically. If it doesn't (or you've closed it prematurely) you can open it again by clicking "Configuration => Configuration Assistant"
- Leave everything to defaults (unless you know what you're doing) except for these settings:
- On "Prusa FFF", select the "0.4 mm nozzle" preset - click on "None" for all OTHER printer families
- Make sure no other printer profiles are selected on "Prusa MSLA" and "Other Vendors"
- Make sure that "Check for application updates" and "Update built-in Presets automatically" are checked on the "Updates" step
Congratulations! You're now set up to use the Printers!
Usage
This section is stolen from the 3D Printing Handbook. You should reference it directly if any questions arise in the future (as you hopefully have been instructed to).
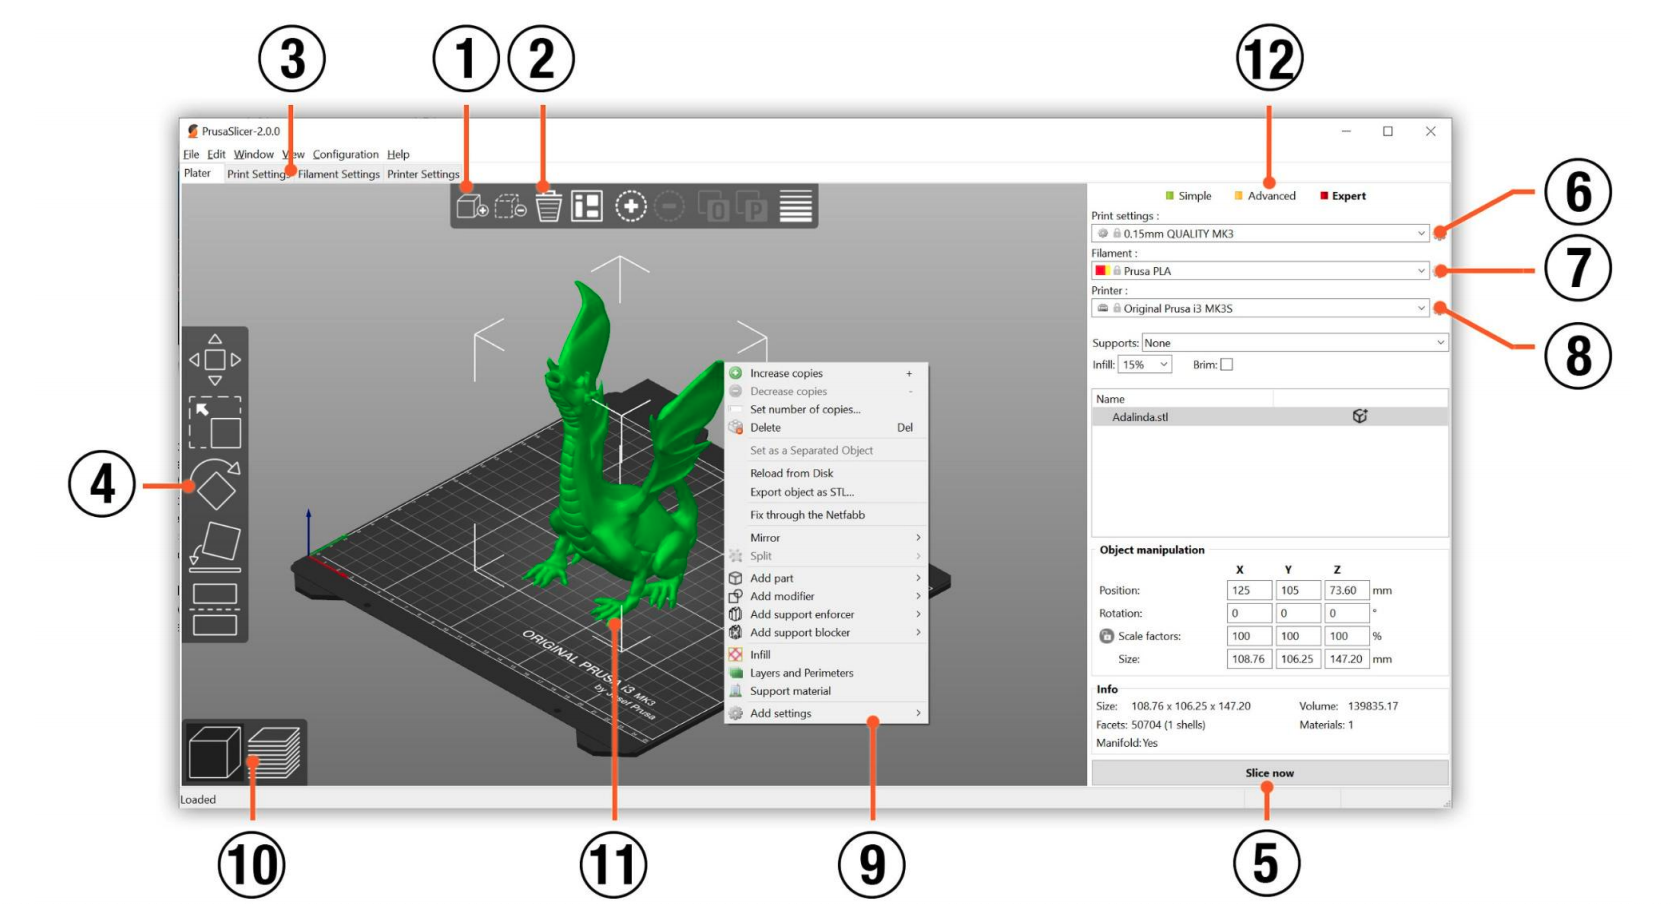
The Interface

- The Add button loads models into PrusaSlicer
- Delete and Delete All buttons remove the model(s) from PrusaSlicer
- Opens the detailed settings of print, filament, and printer
- Move, scale, rotate, Place on Face and cut tools
- Slice and generate .gcode button
- Quality / Speed setting of a print
- Material selection
- Printer selection
- Right-click on model opens a context menu
- Switch between 3D editor and layers preview
- Model preview
- Switch between Simple / Advanced / Expert mode
Basic Usage
- Use the Add button to load your STL (or use fusion to directly handover to PrusaSlicer)
- Add Supports if you need to (again, see the 3D Printing Handbook for more info)
- Select the right printer if you have multiple profiles (Rusa/Lusa on the top shelf are Prusa MINIs)
- Select the Filament type that you want to use
- Plug the USB stick from the Printer into your PC
- A second button next to the "(5) Slice and generate .gcode button" should have appeared => click that
- Give it a useful name and save
- Another Button should have appeared down there => click it to eject the USB stick
- Proceed with pre-print setup as you have been instructed
