Trafficlight: Difference between revisions
Jump to navigation
Jump to search
No edit summary |
mNo edit summary |
||
| (One intermediate revision by one other user not shown) | |||
| Line 1: | Line 1: | ||
{{ | {{ThingInfoBox | ||
|status = working | |||
|name= Internet of Trafficlights (IoT) | |name = Internet of Trafficlights (IoT) | ||
| | |image = Traffic_light.jpg | ||
| | |owner = Tiefpunkt | ||
|description=A trafficlight connected to the internet | |username = tiefpunkt | ||
|description = A trafficlight connected to the internet | |||
}} | }} | ||
We have a traffic light in the space that can be controlled via the internet. | We have a traffic light in the space that can be controlled via the internet. | ||
== Hardware == | ==Hardware== | ||
* Trafficlight | * Trafficlight | ||
* 3 | *3 5V LED Lamps (voltage uncertain) | ||
* | *4-channel relais board | ||
* | * [https://newbiely.com/tutorials/esp8266/esp8266-pinout esp8266] | ||
* | *Barreljack Power Supply (the small white thing in the top of the Photo) | ||
*The [[Multiswitch]] board | |||
* | {|- | ||
[[File: | | [[File:Traffic light pcb front.jpg|center|thumb|The PCB]] || [[File:Traffic light pcb back.jpg|center|thumb|the back of the pcb]] | ||
|} | |||
==Software== | |||
*Running [https://esphome.io/ ESP Home] | |||
== | == Control == | ||
Use [[Homeassistant]] to control the lights either directly or via automations | |||
It's currently tied to the status - closed is red and open is green :) | |||
ESP Home also provides a webinterface which is currently reachable at http://10.10.10.253/ (that's a DHCP IP so it will possibly change soon => TODO: Fix IP Address) | |||
== Pinout == | |||
You can find the pinout for the ESP [https://newbiely.com/tutorials/esp8266/esp8266-pinout here]. | |||
name: red | |||
pin: GPIO5 (D1) | |||
name: yellow | |||
pin: GPIO4 (D2) | |||
name: green | |||
pin: GPIO14 (D5) | |||
[[Category:Project]] | [[Category:Project]] | ||
Latest revision as of 21:47, 24 November 2024
| Internet of Trafficlights (IoT) Status: working [box doku] | |
|---|---|

| |
| Description | A trafficlight connected to the internet |
| Owner | Tiefpunkt (tiefpunkt) |
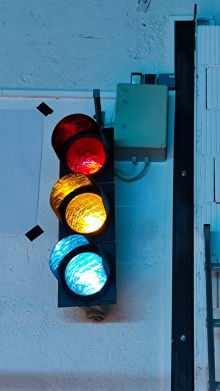
We have a traffic light in the space that can be controlled via the internet.
Hardware
- Trafficlight
- 3 5V LED Lamps (voltage uncertain)
- 4-channel relais board
- esp8266
- Barreljack Power Supply (the small white thing in the top of the Photo)
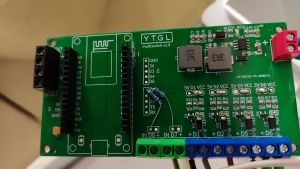
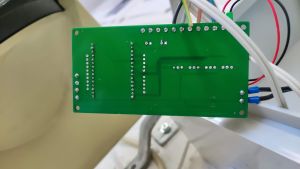
- The Multiswitch board
 |
 |
Software
- Running ESP Home
Control
Use Homeassistant to control the lights either directly or via automations
It's currently tied to the status - closed is red and open is green :)
ESP Home also provides a webinterface which is currently reachable at http://10.10.10.253/ (that's a DHCP IP so it will possibly change soon => TODO: Fix IP Address)
Pinout
You can find the pinout for the ESP here.
name: red
pin: GPIO5 (D1)
name: yellow
pin: GPIO4 (D2)
name: green
pin: GPIO14 (D5)
