Bambulab P1S: Difference between revisions
Spacezhang (talk | contribs) (Created page with "{{ThingInfoBox |name = Bambulab P1S + AMS |status = working |image = P1S.png |description = Bambulab P1S + AMS |owner = MuMaLab |username = |financing = Bought from official Vendor (€877) |buildvolume = 256x 256x 256 mm (11.8 x 11.8 x 15.7 in) |nozzle = 0.4 mm stainless steel }} TBD == Details == TBD == Quickstart guide== TBD == Machine operation == === Insert filament === [comming soon] === Unload filament === [comming soon] === Start...") |
(basic info) |
||
| (One intermediate revision by the same user not shown) | |||
| Line 19: | Line 19: | ||
TBD | TBD | ||
== Machine operation == | == Machine operation == | ||
=== Connecting to the Printer === | |||
* Go to the printer page in Bambu Studio | |||
[[File:Bambu device.png|thumb|center]] | |||
* Click on "No Printer" to open the dropdown | |||
[[File:Bambu no printer.png|thumb|center]] | |||
* Select the only printer that shows up | |||
[[File:Bambu select printer.png|thumb|center]] | |||
* Enter the access code you can get from the printers settings | |||
[[File:Bambu access code.png|thumb|center]] | |||
And that's it! You should be able to run calibration for your filament, send a print and watch it with the webcam now. Beware that this *should* only work from the munichmakerlab WiFi. | |||
=== Calibrating your own filament === | |||
If you bring non-bambu filament you'll probably have to calibrate it first. For this you'll need the official BambuStudio slicer as calibration does not appear to work with orcaslicer. | |||
To do that you'll have to connect to the printer as described above. After that you'll go over to the calibration tab and run the calibrations listed in there. | |||
Your K Factor (used for pressure advance) should end out at about 0.02 and the flow multiplier at around 0.95. | |||
=== Insert filament === | === Insert filament === | ||
[ | Check out [https://wiki.bambulab.com/en/x1/manual/ams-setup-and-filament-loading this page.] (The AMS is aleady set up ofc.) | ||
=== Unload filament === | === Unload filament === | ||
Check link above. | |||
=== | === Slicing and Starting the print === | ||
[ | Give [https://youtu.be/xUi54VpSeek?si=PsIAnWxdlwb2MpeD this video] a watch. Make sure to select the P1S in the settings. | ||
=== Unified bed leveling === | === Unified bed leveling === | ||
[comming soon] | [comming soon] | ||
== Guide Video == | == Guide Video == | ||
[comming soon] | [comming soon] | ||
== Suggestions and Feedback == | == Suggestions and Feedback == | ||
Revision as of 19:59, 13 July 2024
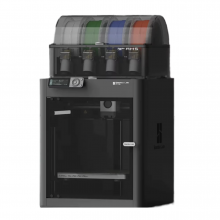
| Bambulab P1S + AMS Status: working [box doku] | |
|---|---|
| |
| Description | Bambulab P1S + AMS |
| Owner | MuMaLab |
| Financing | Bought from official Vendor (€877) |
| Build Volume | 256x 256x 256 mm (11.8 x 11.8 x 15.7 in) |
| Nozzle | 0.4 mm stainless steel |
TBD
Details
TBD
Quickstart guide
TBD
Machine operation
Connecting to the Printer
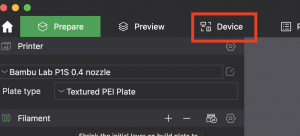
- Go to the printer page in Bambu Studio
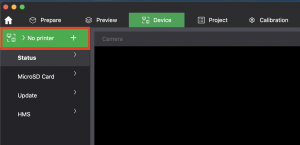
- Click on "No Printer" to open the dropdown
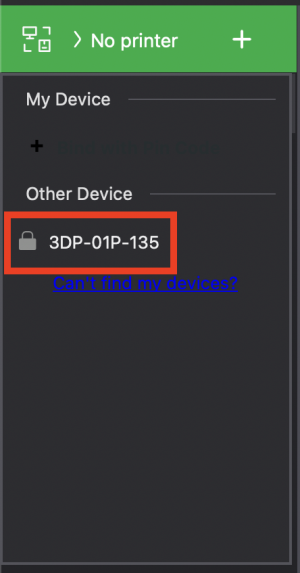
- Select the only printer that shows up
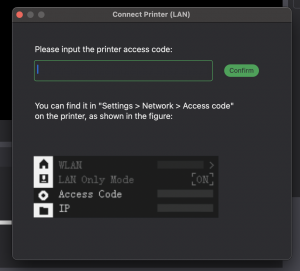
- Enter the access code you can get from the printers settings
And that's it! You should be able to run calibration for your filament, send a print and watch it with the webcam now. Beware that this *should* only work from the munichmakerlab WiFi.
Calibrating your own filament
If you bring non-bambu filament you'll probably have to calibrate it first. For this you'll need the official BambuStudio slicer as calibration does not appear to work with orcaslicer.
To do that you'll have to connect to the printer as described above. After that you'll go over to the calibration tab and run the calibrations listed in there.
Your K Factor (used for pressure advance) should end out at about 0.02 and the flow multiplier at around 0.95.
Insert filament
Check out this page. (The AMS is aleady set up ofc.)
Unload filament
Check link above.
Slicing and Starting the print
Give this video a watch. Make sure to select the P1S in the settings.
Unified bed leveling
[comming soon]
Guide Video
[comming soon]
Suggestions and Feedback
Do you have any suggestions or feedback in regard to the printer, its maintainance and its current status?
Please write your comments below!
- [Comment]
